


Before knowing the tips for a flexible body let us first understand what are the benefits of a flexible body:
1. Fewer injuries
Once you develop strength and flexibility in your body you’ll be able to withstand more physical stress. Plus, you’ll rid your body of any muscle imbalances, which will reduce your chance of getting injured during physical activity. Correcting muscle imbalances requires a combination of strengthening the underactive muscles and stretching the overactive (tight) ones.
2. Less pain
Your body is likely to feel better overall once you work on lengthening and opening your muscles. When your muscles are looser and less tense, you’ll experience a few aches and pains. Plus, you may be less likely to experience muscle cramps.
3. Improved posture and balance
When you focus on increasing muscular flexibility your posture is likely to improve. Working out your body allows you to have proper alignment and correct any imbalances. Plus, with an increased range of motion, you may find it easier to sit or stand in certain ways. Yoga has been shown to improve balance.
4. A positive state of mind
Regularly engaging in poses that stretch and open up your body can bring about feelings of relaxation. The physical benefits can extend to a relaxed state of mind. You may find it easier to unwind once your body feels better.
5. Greater strength
It’s important to increase strength as you become more flexible. This ensures your muscles will have the right amount of tension so that they’re strong enough to support you and your movements, allowing you to become more physically fit.
6. Improved physical performance
Once you increase your flexibility to allow greater movement in your body you’ll be able to perform better physically. This is in part because your muscles are working more effectively.
So now after knowing the benefits of flexible body let us now understand the ways for getting a flexible body:
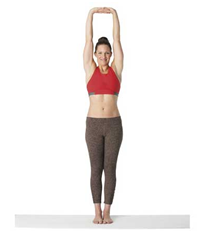
1. TADASANA (PALM TREE POSE)
This yoga pose is a basic level hatha yoga pose and should be ideally performed on an empty stomach or three to four hours after meals.
Tadasana is great for improving flexibility, overall posture and strengthening the legs. It helps in making your spine more flexible and firms your buttocks and abdomen. This is a great asana for relieving any kind of pain or relieving tension from the body.
Steps To Do
- Stand with your feet a few inches apart and your arms by your side.
- Exhaling gently shift your body weight on your toes and stretch your entire body upwards.
- Hold the pose for a few seconds, inhaling come back.
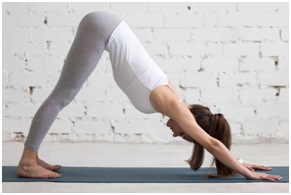
2. MOUNTAIN POSE (PARVATASANA):
This pose is good for everything, particularly stretching the hamstrings and calves along the backs of the legs.
Instructions:
- Come to your hands and knees with the knees slightly behind your hips.
- Curl your toes under and lift your knees from the floor.
- Lift your seat to the ceiling by straightening your legs.
- Pedal your feet one at a time.
- Settle into relative stillness for a least five breaths while pushing strongly into the palms of your hands and maintaining the inverted V shape of the posture.
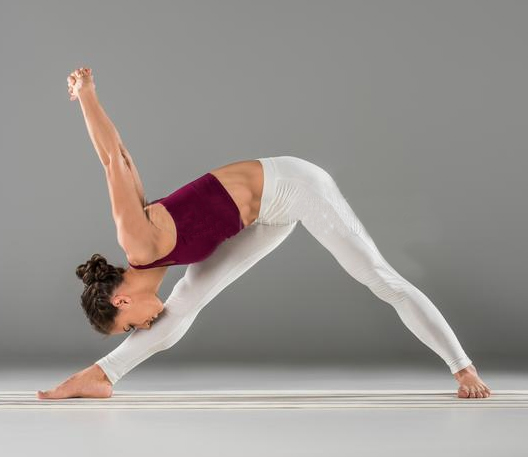
3. PYRAMID POSE (PARSVOTTANASANA)
Pyramid pose goes deep into your hamstrings and hips. Remember that both hip points face the fronts of the mat in this posture.
Instructions:
- From the Mountain Pose, step your right foot to the inside of your right hand.
- Step your left foot toward the front of your mat about five inches and out to the left side about 3 inches. (Distances may vary depending on your size and flexibility.)
- Lower your left heel so that your toes are turned out about 45 degrees.
- Straighten both legs, lifting your hips.5. If you need more stability, you can step your left foot farther out to the left side of your mat. Both hips continue to face the front of the mat
- Inhale to come to a flat back. Exhale to lower your chest toward your right knee.
- Repeat this process of lengthening on the inhalation and deepening on the exhalation for about five breaths. Then switch sides.
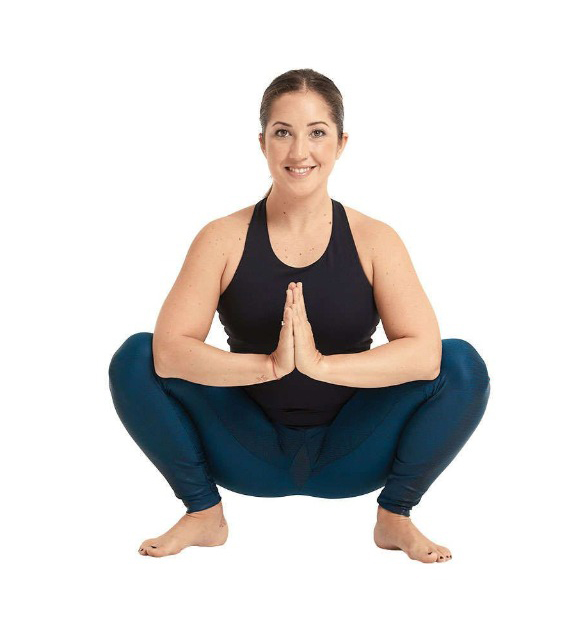
4. SQUAT POSE (MALASANA)
Squatting was once quite a natural way to sit but most of us have lost the habit and, with it, the ease. If your heels come up a lot, take a rolled or folded blanket underneath them. You can also place a block under your seat for additional support if this squat is very intense for you.
Instructions:
- Come to stand at the front of your mat with your feet about 12 inches apart.
- Bend your knees to assume a deep squatting position.
- Bring your elbows to the insides of your knees and take your hands into Anjali mudra at your heart. Use your elbows to gently push the knees apart.

5. Camel Pose (Ustrasana):
Ustrasana or the camel pose is an asana for reducing belly fat and give strength to muscles. It can tone your abdominal area, thighs and arms to improve the flexibility. This is an advanced and best Yoga to reduce belly fat.
How to do this?
- Kneel down on your knees and then bend torso backwards in an arched form towards heels while his arms go backwards supporting his upper body weight on the back of your foot.
- The trick is to hold the position for a while, inhalation exhalation continuing and then go back to the basic pose and then do it all over again.
- This must be done in succession over the next few days for the best results.
Caution: This pose can strain your neck muscles. So, refrain if you have problems related to the neck.
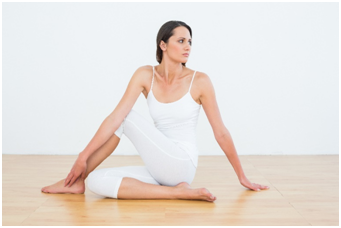
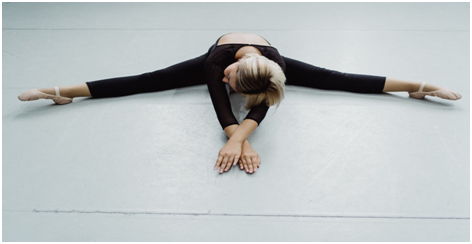
6. HALF SPINAL TWIST (ARDHA MATSYENDRASANA)
While it may seem like most of the action is in the upper body here, there’s a lot of passive stretching going on in the lower body too (especially in the hard to reach outer thigh, technically part of the glutes), so make sure to set it up carefully and keep the sole of your right foot in strong contact with the floor. Most of us don’t do much twisting in daily life so start gently and this will feel good on your ribcage and back.
Instructions:
- Sit with the legs stretched out.
- Bring your right foot to the outside of your left thigh with the right knee pointing up and the right sole flat on the floor.
- Scoot your left foot to the outside of your right buttock with the outside of your left foot on the floor.
- Inhale both arms up and exhale to twist to the right, bringing your right hand to the floor behind you and your left elbow to the outside of your right knee.
- Activate your left hand and press the right foot into your mat.
- Take your gaze over to the right, but make sure that your twist doesn’t originate in your neck.
- On your inhalations, grow your spine long, and on your exhalations, deepen your twist by pressing your left elbow into your right thigh.
- After five to ten breaths like this, release and do the other side.
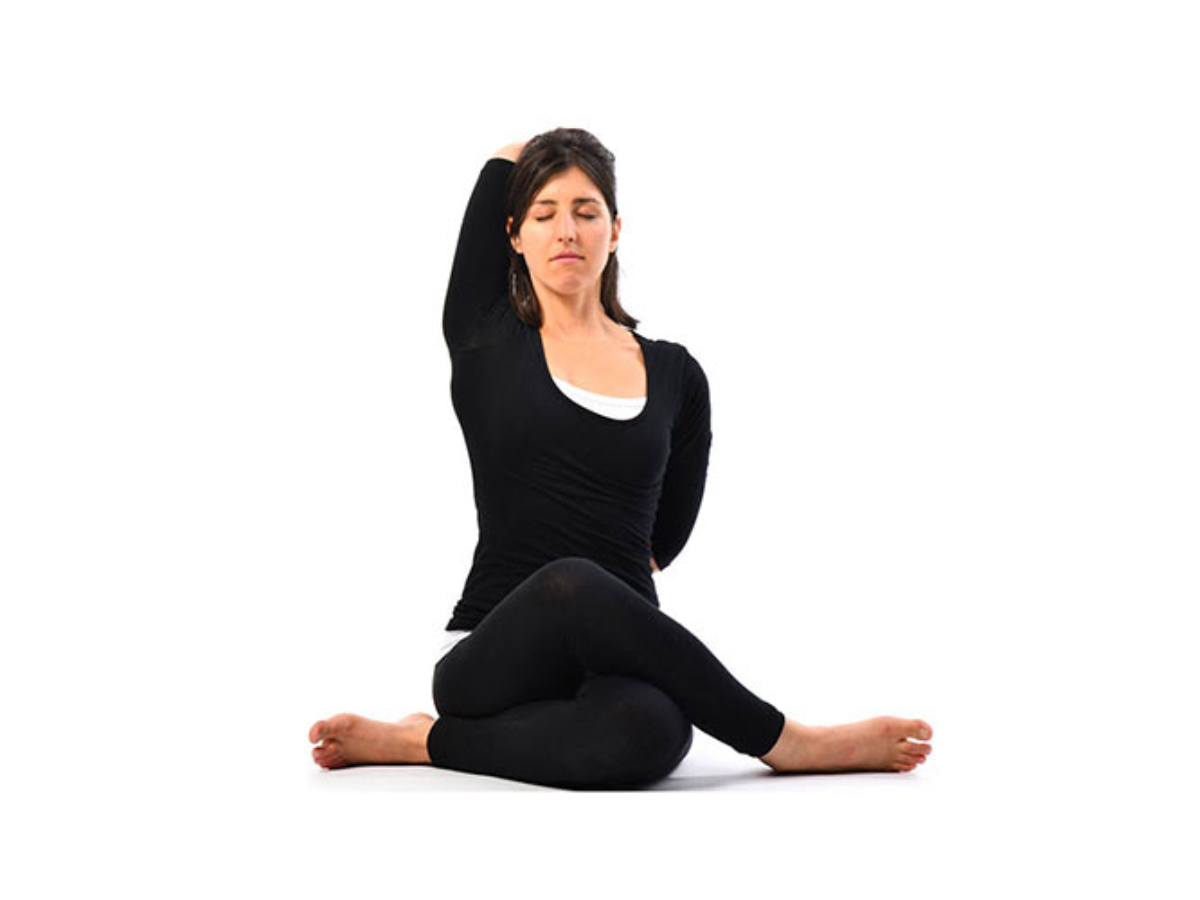
7. COW FACE POSE (GOMUKHASANA)
Cow face is another pose that takes the body to places we don’t normally go and therefore is a really good antidote to all the slumped over sitting we frequently do. This arm position can be quite challenging, so have a strap handy and get ready to stretch the biceps, pectorals, trapezius, and serratus anterior.
Instructions:
- In a seated position, stack your right knee on top of your left knee at your midline with the feet reaching toward the opposite buttock.
- Lift your right arm to the ceiling and then bend your elbow so that your right hand comes to your upper back.
- Reach your left arm to the left and then bend your left elbow down so your left hand is reaching up the centre of your back.
- The idea is for the hands to meet and clasp behind your back. If no way is happening, use a strap between the hands or hold onto your shirt with each hand to create a bit of traction.
- If your hands are connected, you can press your head into your right arm gently.
- Keep hugging both elbows toward the midline for three to five breaths. Then release and try the other side.
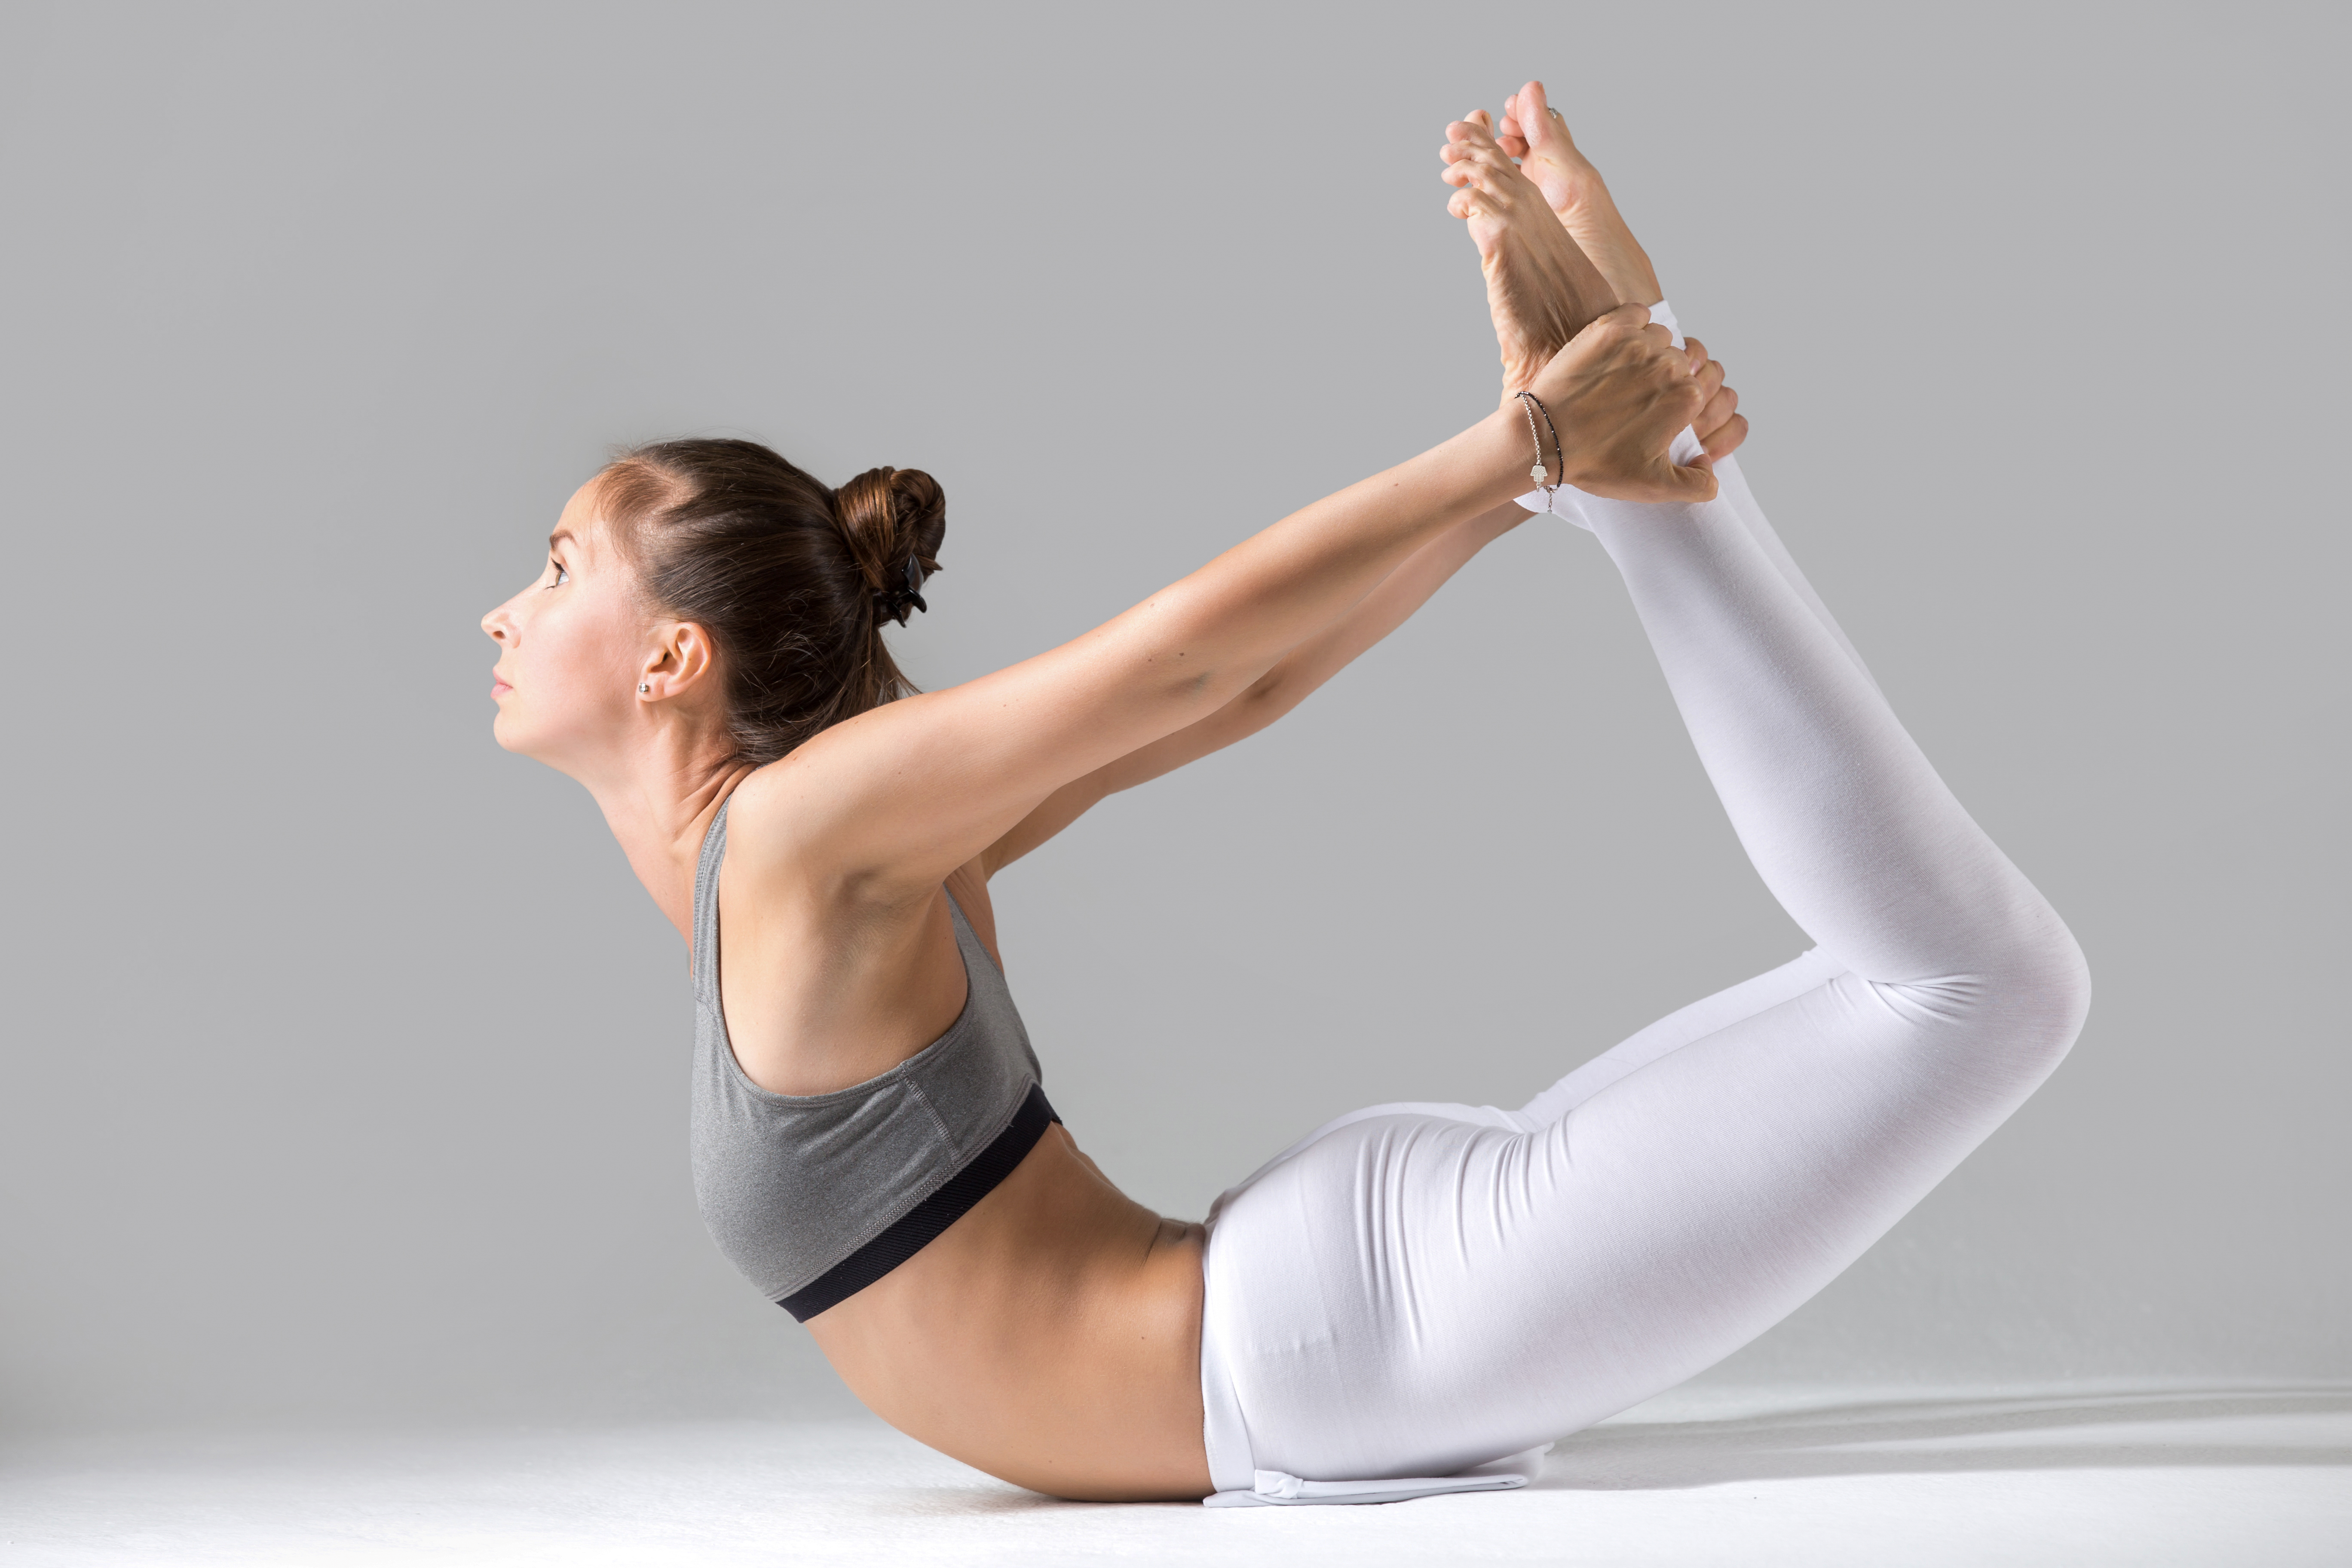
8. BOW POSE (DHANURASANA)
Dhanurasan gives a stretch and relaxant effect to your abdominal muscles, back and the whole spine. The whole area becomes flexible.
Steps for Dhanurasana
- To do Dhanurasana, first of all, lie down on the yoga mat.
- Now bend your knees slightly, lifting the legs backward and holding your ankles with your hands while arched.
- After this, raise the legs a little more and try to pull your ankles by hand while breathing.
- To get more benefits, keep Regular practice of this posture every day.
9. COBBLER’S POSE (BADDHA KONASANA):
The Cobbler’s pose is one of the simplest Yoga asanas. It aids in flexibility and can be performed by beginners as well. It removes the stiffness from the back, hips and around areas.
How To Do?
- The cobbler’s pose is single of the easiest plus obliging pose of yoga. You require sitting down by your spine straight.
- Your knees must be twisted and the soles of your feet must be opposite each other.
- You must push the soles jointly and grasp this pose for as a minimum a minute.
Cautions: Avoid this exercise if you have a groin injury. You can also place a mattress underneath for additional support.